

To inspect motorcycle gloves before winter, check seven things: seams, palm wear, the thumb crotch, the lining, leather condition, fit, and the wrist closure. It takes about ten minutes with good light. Anything that opens, thins, or cracks now will fail when you are cold and moving at 60 mph.
Do this before your first cold ride, not after. If a pair fails the check, you have time to condition it, repair it, or replace it.
Step 1: Check every seam
Seam failure is the most common glove problem, and it starts at stress points. Turn the glove inside out if the construction allows, and look for loose or missing stitches at the finger bases and between the fingers. Pull gently on each seam. A seam that gives under light pressure will not survive a full season.
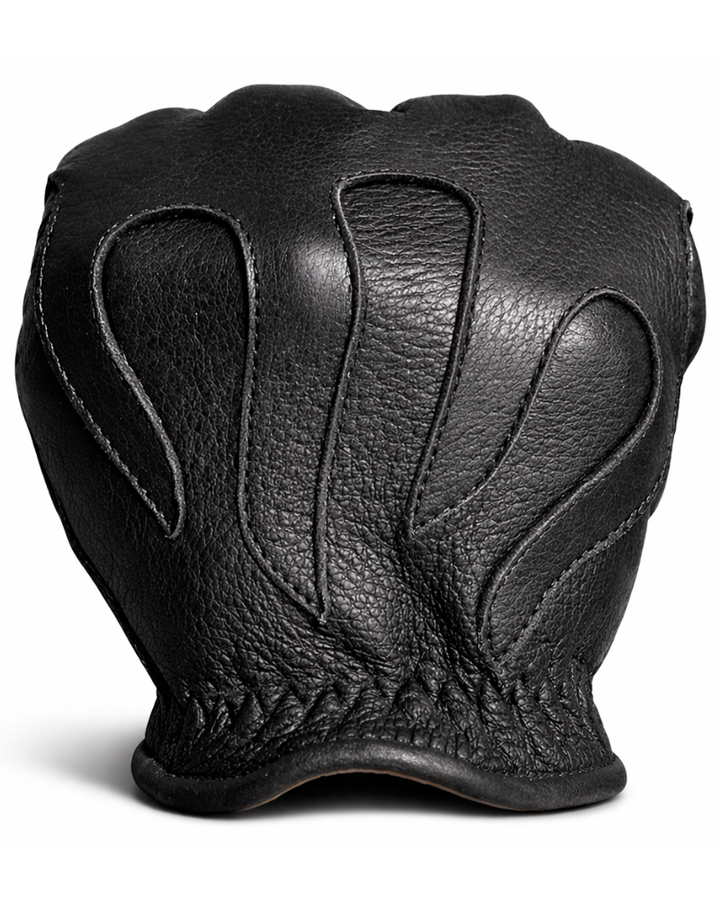
Outseam construction, where the stitching sits on the outside of the finger, makes this check easy because you can see every stitch. Legendary USA uses outseam construction on pairs like the ILL Dozer Perforated Outseam Deerskin Gloves, which shows the seam line without turning the glove inside out.
Step 2: Look at the palm and grip area
The palm and the inside of the fingers wear fastest because they sit against the grips. Look for shiny, thin patches, and press them. If the leather feels paper-thin or you can see through it, that area is worn out. Light polishing is normal. Thinning is not.
Step 3: Inspect the thumb crotch
The thumb crotch, the joint between thumb and index finger, takes the most flex. A keystone thumb is a construction method that adds a separate panel there for freer movement, but any thumb design can crack or split at this spot. Spread your thumb wide and look for fine cracks or stitching that pulls the leather.
Step 4: Feel the lining
Lining matters more in winter than any other season. Reach inside and feel for bunched, flattened, or torn fleece. A lining that has matted down no longer traps much air. On the Fleece-Lined Deerskin Gloves, the 3M Thinsulate 40-gram lining should feel even from finger to finger.
If a pair has gotten wet, see how to dry wet leather motorcycle gloves so the lining does not stay damp and mat down.
Step 5: Test the leather itself
Healthy leather is flexible and slightly oily. Bend a finger and watch the surface. Fine lines are normal. Deep cracks, a chalky look, or stiffness mean the leather is dry. Dry deerskin can be conditioned. Cracked leather cannot be reversed.
Condition leather before storage or the cold season, using a conditioner made for leather and following its directions. Our guide to maintaining leather gear through winter covers the routine.
Step 6: Re-check the fit
Gloves change shape over a season, and your winter layers change what fits. Put the glove on over a thin liner if you plan to use one, and grip the bars. You should close your fist without the leather pulling tight across the knuckles. If you need liners, read how to size gloves for thick liners.
Step 7: Test the closure and cuff
The wrist closure keeps cold air out. Check that the strap, Velcro, or snap still holds firmly and that the elastic has not stretched out. On a gauntlet like the Classic Deerskin Gauntlets, check that the cuff still seals over your sleeve or under it, depending on how you wear it.
Repair, recondition or replace?
| Problem | Action |
|---|---|
| Dry, stiff leather, no cracks | Clean and condition |
| A few loose stitches at a seam | Have a cobbler or leather shop re-stitch |
| Thin palm, cracked thumb crotch | Replace |
| Flattened or torn lining | Replace for cold riding |
| Closure no longer holds | Repair if simple, otherwise replace |
If you are replacing, start with the Made in USA motorcycle gloves collection, and keep a second pair so you can rotate. Our fall and winter glove rotation guide explains how.
Final word
A ten-minute inspection costs nothing and tells you which pair is ready for cold weather. Leather that is conditioned, seams that hold, and a lining that still has loft will carry you through the season. Gloves are protective gear but not armor, so replace anything that is worn through at the palm.
Frequently asked questions
- How do I know if my motorcycle gloves need to be replaced?
- Replace gloves with a worn-through or paper-thin palm, a cracked thumb crotch, seams that pull open, or a flattened lining you plan to rely on in the cold. Stiff leather without cracks can often be conditioned, but cracked or thin leather cannot be restored.
- How often should I inspect my motorcycle gloves?
- Inspect them at least twice a year, once before cold weather and once before riding season starts. Riders who commute daily or ride high mileage should look them over every few months, since seams and palms wear faster with heavy use.
- Can I repair motorcycle glove seams at home?
- Small loose stitches can be re-sewn by a cobbler or leather repair shop. Doing it yourself with weak thread usually fails. If seams are opening in several places or near the fingers, replacing the gloves is the safer choice. A repair only makes sense when the leather around the seam is still strong.
- Should I condition leather motorcycle gloves before winter?
- Yes, if the leather feels dry or stiff. Clean the gloves first, apply a conditioner made for leather in a thin coat, and let them air dry away from direct heat. Over-conditioning can soften the leather too much, so use a light hand. Never use a hair dryer or heater to speed things up.
- How do I check whether my glove lining is still good?
- Reach inside and feel the lining along every finger. It should feel even and have some loft. If it is matted flat, torn, or bunched up, it will not trap warmth. Compare it to a new pair of the same style if you are unsure. A lining that has lost its loft is the main reason gloves feel colder than they should.