





Replace motorcycle gloves when the palm has thinned enough to see light through it, when a seam has opened, or when the leather no longer springs back after you close your hand. Those three conditions end a glove's service life regardless of how old it is. Legendary USA has been building and selling American-made riding gloves since 2001, and the end of a riding season is the right time to run this check on every pair in your rotation.
Run the Seven-Point Check

Take the gloves somewhere with good light. A window works. Go through them one panel at a time.
- Hold the palm up to the light. If you can see daylight through the leather, or the palm has gone noticeably translucent compared to the back of the hand, the hide has thinned past useful. This is the single most common failure point and the one riders miss because they never look at it directly.
- Run a thumbnail along every seam. Look for thread that has gone fuzzy, frayed, or opened. One popped stitch is not a failure. A seam that has opened a quarter inch or more is.
- Close your fist and watch the leather. Good leather takes the crease and releases it. Leather at the end of its life stays creased, and those permanent fold lines are where it will split first.
- Check the outside edge of the little finger. On any glove that has been down, that panel and the heel of the palm take the first contact. Scuffing there means the glove is retired.
- Check the lining. A fleece or aramid lining that has bunched, separated at the fingertips, or torn free will keep balling up under your hand.
- Test the cuff closure. A snap that no longer holds or a slack elastic wrist lets the glove shift on the grip and lets cold air in.
- Put them on and grip something. If the palm bunches, the fingertips gap, or the leather slides against the grip, the fit is gone even if the material looks fine.
Wear That Matters vs. Wear That Does Not
Not every mark on a glove is a problem, and riders throw out perfectly good leather all the time.
Cosmetic and fine: darkened palms from grip transfer, a patina on the back of the hand, minor scuffing on the knuckle area, color fade on a black glove that has seen a lot of sun, and softness that came from break-in rather than breakdown. American deerskin is supposed to get softer. That is the material working as intended.
Structural and not fine: thinned palms, open seams, cracked leather at the flex points, delaminated or hardened panels from heat damage, and any panel that has been dragged on pavement. These are not cosmetic. They are the glove telling you it has spent its abrasion resistance.
The tradeoff worth understanding: a soft, broken-in glove feels better than a new one and gives you better grip feel, so there is real incentive to keep riding a pair too long. Feel and protection move in opposite directions at the end of a glove's life.
Deerskin vs. Goatskin: How They Age Differently
The two hides Legendary USA uses most fail in different ways, and knowing which you own tells you what to watch.
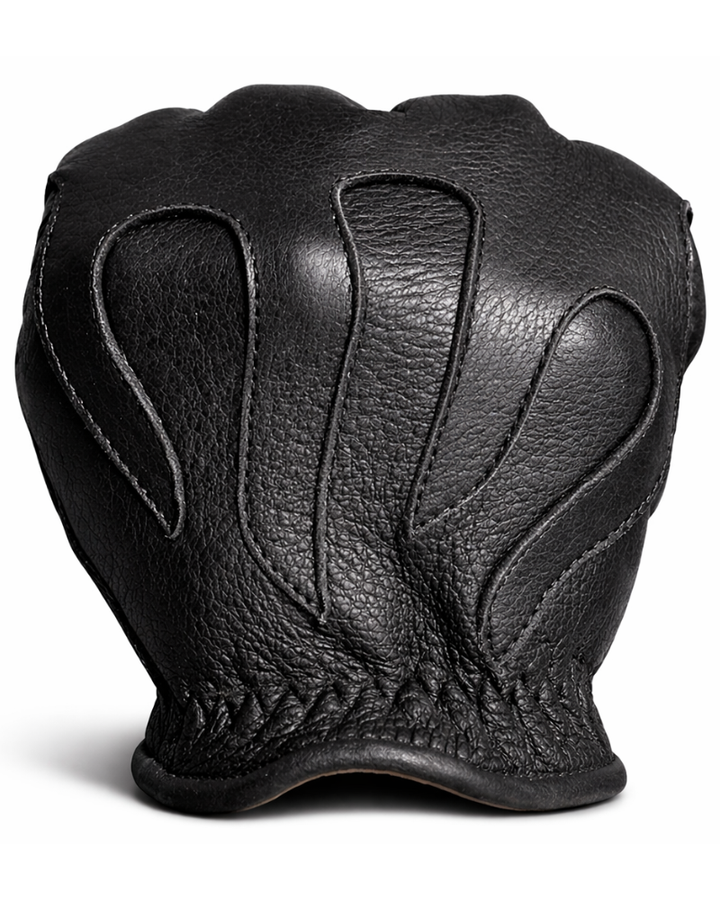
Deerskin has an open, stretchy fiber structure. It breaks in fast, molds to your hand within two to three weeks of regular riding, and stays soft in cold air. Deerskin tends to age by relaxing: the failure mode is a palm that has thinned and a fit that has gone loose. Watch the palm thickness on a deerskin glove like the fleece-lined deerskin gloves.
Goatskin is denser and more abrasion resistant, with a tighter grain and less give. It holds its shape far longer, so goatskin rarely goes loose. Goatskin tends to age by hardening, especially if it has been repeatedly soaked and dried without conditioning. Watch for stiff panels and cracking at the knuckle flex on a goatskin glove like the Bad Billy black goatskin gloves.
What to Do Before You Replace
Some gloves that feel finished are just neglected. Try the cheap fixes first.
Clean off the road film with a barely damp cloth and let the glove air dry at room temperature, away from heaters and direct sun. Heat ruins leather, not water. Then condition lightly with a product made for garment leather rather than a heavy boot grease, stopping well before the leather looks saturated. A stiff glove that simply dried out will often come back. A glove with a thin palm will not.
For the full routine, see our guide on leather motorcycle glove care.
Replacing at the Right Time of Year
Late summer and early fall are the right moment to run this check. You have a full season of wear to evaluate, you still have riding weather ahead to break in a replacement, and you are not trying to break in stiff new leather on a 40-degree November morning. New gloves want a few hundred miles of moderate temperatures to settle in.
If the check turned up a pair that needs replacing, the Made in USA motorcycle gloves collection has the deerskin and goatskin options in short-wrist, gauntlet, lined, and perforated. If you are unsure about sizing the replacement, our guide on how to size motorcycle gloves covers hand measurement and the grip test.
The National Highway Traffic Safety Administration's motorcycle safety guidance covers protective gear and pre-ride checks in more detail.
Frequently Asked Questions
- How often should you replace motorcycle gloves?
- There is no fixed mileage or calendar interval. Replace motorcycle gloves based on condition, not age. A well-made American deerskin or goatskin glove ridden a few times a week commonly lasts three to five seasons, while a daily commuter glove may wear through a palm in two. Check the palm thickness, the seams, and the leather's ability to hold shape at the end of each riding season. Any glove that has been through a crash gets replaced immediately regardless of how it looks.
- What are the signs motorcycle gloves are worn out?
- The clearest signs are a palm you can see light through when held up to a window, stitching that has opened or gone fuzzy along a seam, leather that stays creased instead of springing back, a lining that has bunched or torn free inside the fingers, and a cuff closure that no longer holds tension. Any one of these means the glove is at the end of its service life. Thin palms and open seams are the two that matter most.
- Should I replace motorcycle gloves after a crash?
- Yes. Replace any glove that has taken a slide, even if the outside still looks intact. Leather that has been dragged across pavement has already given up abrasion resistance in that panel, and the stitching along that seam has been loaded once. A glove is a single-use item in that sense. Inspect the palm and the outside edge of the little finger first, since those are the panels that usually contact the road.
- Can worn motorcycle gloves be repaired?
- Some things can be repaired and some cannot. A single opened seam on an otherwise sound glove can be restitched by a leather worker or a shoe repair shop, and a loose cuff snap can usually be replaced. A thinned or worn-through palm cannot be meaningfully repaired, because patching over it adds a bulk ridge under your grip and does not restore the original hide. If the palm is gone, buy a new pair.
- Is it worth replacing gloves that only feel loose?
- Yes, if the looseness shows up under grip. Leather that has relaxed past the point where it stays put will slide on the grips and bunch in the palm, and that costs you control and creates hot spots on long rides. Deerskin conforms to your hand over the first few weeks and then holds. When a pair keeps growing well past that point, the fiber structure has broken down and a new pair is the fix.
- What should I look for when buying replacement motorcycle gloves?
- Look at construction before you look at price. Check whether the seams are outseam or inseam, since outseam construction keeps the seam allowance off your palm. Check the thumb: a keystone thumb is set in as a separate piece and follows the natural angle of the hand. Check that the leather is full-grain rather than a split or corrected surface. Then fit it in a riding grip, not with your hand flat.
The Short Version
Hold the palm to the light, run a nail along the seams, and close your fist. A translucent palm, an open seam, or leather that stays creased means the pair is done, and no amount of conditioner brings any of those back. Everything else on a well-made American glove is patina. Run the check at the end of every season while there is still riding weather left to break in whatever you replace.